

Contents
Using a Jira bug reporting and tracking tool helps developers and their teams record and track the status of bugs in their apps from start to finish. You can add a bug description, attachments, identify the affected versions, assign them to the right members to fix, and assign severity levels, all while having a single overview of everything in the backlog.
Jira allows you to customize workflows based on your needs. You can adjust and mold your flow in any way you want so that you can track your issues from beginning to end based on your processes. People have been using Jira successfully in many ways, from agile project management, service desk ticket tracking, and even writing. However, one of the most popular applications is Jira bug reporting and tracking.
Here's everything you need to know to create a bug workflow in Jira and get started with Jira as a bug tracking tool.
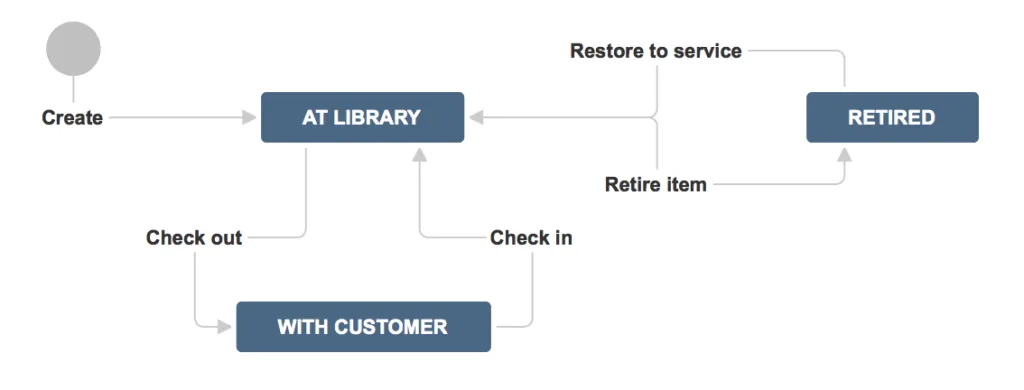
The workflow is the scheme that your projects follow. It's a set of statuses and transitions that an issue goes through during its lifecycle. The workflow is the environment that the issue maneuvers through until it's deemed closed, or in our example, the stages a reported bug goes through before it’s considered fixed.
To create a workflow you need to define two main components: your statuses and transitions. Those determine the different allowed stages and paths that the bug can go through.
Workflow types
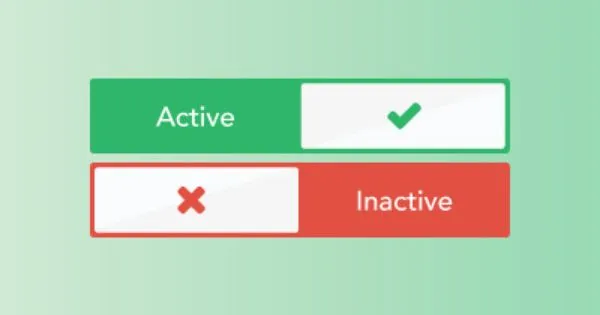
An Inactive Workflow is a Jira workflow that isn’t being used and has no project currently assigned to it. You can edit the statuses and transitions of a workflow at this stage.
An Active Workflow is a Jira workflow that is being used and has one or more projects currently assigned to it. You can’t edit the statuses or transitions of a workflow at this stage, as it would affect the projects assigned to it.
Statuses
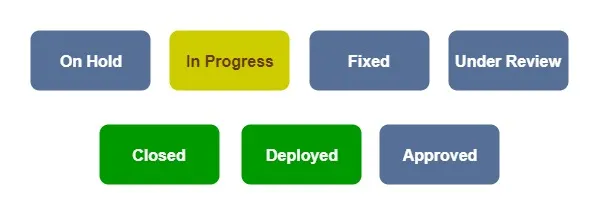
A status represents the current state of an issue in a specific workflow. An issue can only have one status at a given point in time. In our case, you need to define all the steps a bug goes through when it passes through your workflow. This will depend on things like your project management methodology, team members, and company structure.
A common set of statuses for fixing bugs are those shown above. "On Hold" is the first state of a bug after it gets reported. "In Progress" indicates that the bug is being fixed, where the bug to be fixed is chosen based on level of severity and then gets assigned to the team/person responsible for fixing it. Once the bug has been resolved, it would have a "Fixed" status, which typically acts as the Quality Assurance team backlog.
"Under Review" means it is being processed by QA, while "Approved" means the bug fix has passed review. "Deployed" means that the bug fix is live in production. Keep in mind that an issue can pass through different statuses multiple times until it reaches its final status, which is "Closed".
Now that your statuses are set, you need to define the paths that the bug can take to go from one state to another, which are the transitions.
Transitions
A Transition is a link between two statuses. In order for an issue to move between two statuses, a transition must exist. While a status represents the state of a bug, a transition is the action that moves it to and from that state. Transitions can only move in one direction, so in order to create a bi-directional path, you will have to create two different transitions between two statuses.
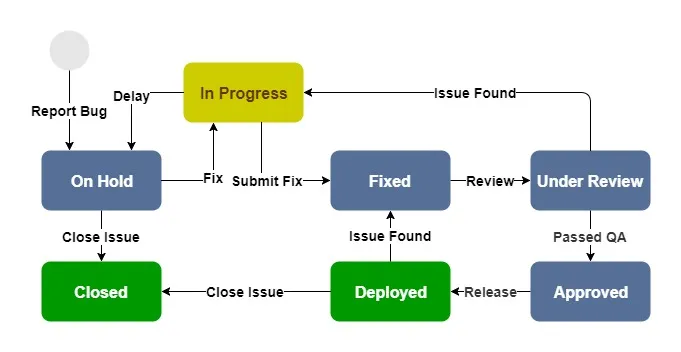
In our example, the first action that occurs in the lifecycle of a Jira bug report is that it gets reported, so "Report Bug" is the first transition, and it moves the bug to the "On Hold" status. Depending on the severity of the bug, reported bugs that are "On Hold" could either stay "On Hold", move forward to "In Progress", or rejected and deemed "Closed". The action, or transition, that moves the bug to "In Progress" is to "Fix" it, while a "Close Issue" transition moves it to the "Closed" status. A bug can be de-escalated from "In Progress" to "On Hold" if you decide to "Delay" it, the action that connects those two statuses.
Meanwhile, a bug report moves from "In Progress" to "Fixed" with a "Submit Fix" transition when it gets sent to your QA team. When they select a bug to "Review", the next transition, the bug's status becomes "Under Review". From that status, the bug could either move back to the "In Progress" status if there is an "Issue Found" by QA, or if the bug fix has "Passed QA", it could move to the "Approved" status. Once "Approved", when you "Release" the bug fix, it moves to the "Deployed" status. If there is an "Issue Found" after deployment, the bug returns to the "Fixed" status for QA to evaluate again. Finally, the bug report moves from "Deployed" to "Closed" with a "Close Issue" transition.
Workflow Editing Types
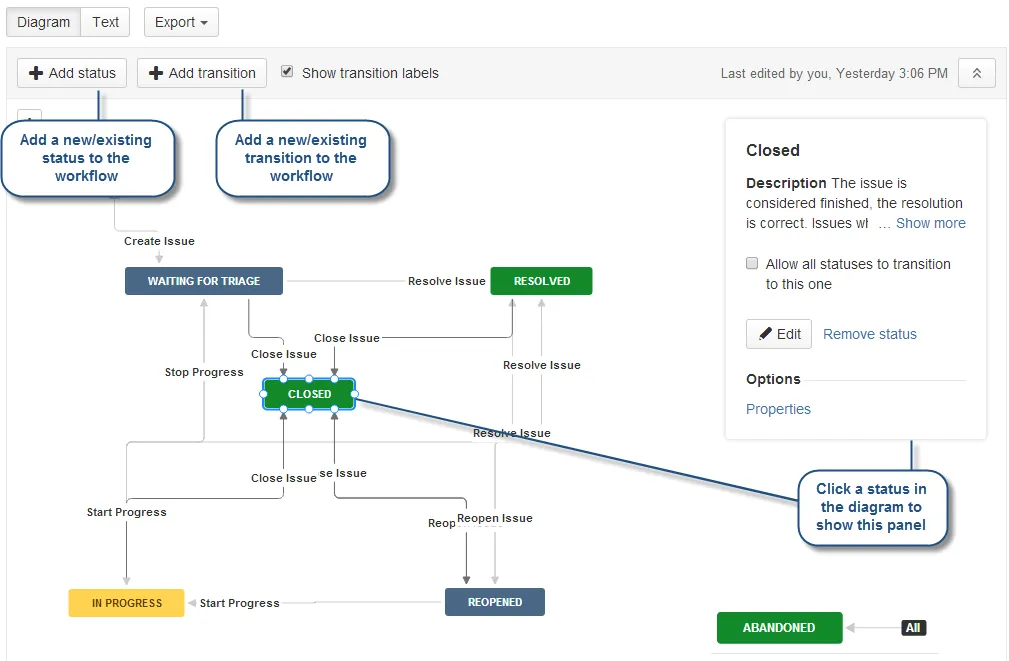
Workflow Designer is a very simple and easy to use tool that helps you visualize the layout and flow of your process. It allows you to add the statuses and link them together using the transitions through drag and drop. When a status is selected, you can edit its properties, rename it, or delete it.
Text Mode is a more advanced way to edit and work with workflows. You can also use the text mode to add, remove, or edit steps and transitions.

An Issue is an item in your project. Depending on how you, or your company, are using Jira, the issue can represent a project task, a helpdesk ticket, a request form, or pretty much anything you want it to represent. In our example here, an issue represents a mobile app bug.
When you create an issue, you need to add all relevant information for it, such as a summary, description, type, priority, resolution, and many more. You can even attach documents, pictures, voice notes, and videos. This would allow your team members to understand the bug in detail and prioritize which ones to work on first.
Resolutions
Statuses are categorized into two types: unresolved and resolved. When an issue is assigned a resolution, then it’s considered resolved, otherwise it’s considered as unresolved by default.
For example, unresolved statuses would be when the bug is in “On Hold” or “In Progress” while resolved statuses would be “Deployed” or “Closed”.
Creating an issue
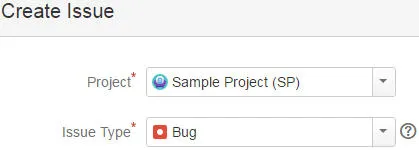
When creating an issue, you need to select the project you want to add this bug to, as well as the issue type. For bug reporting, we'll be choosing the issue type "Bug", but let's take a quick look at the different issue types available.
Issue types
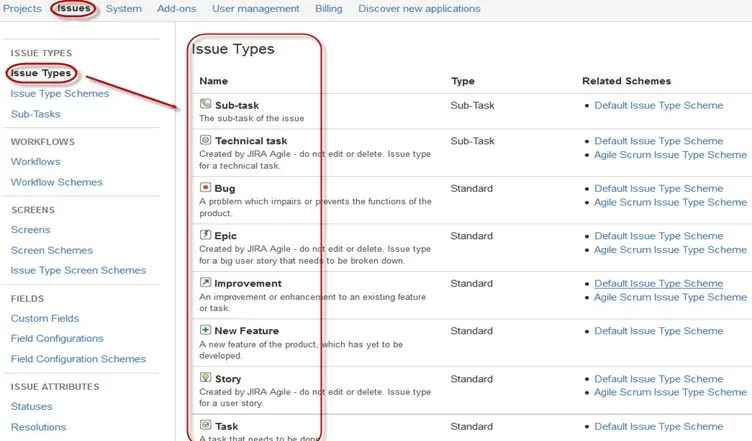
Each Jira application comes with its issue types, depending on what you need to get accomplished. You can also create your own issue types.
Some default Jira issue types are:
- Task: Something that needs to be done/accomplished
- Sub-task: Subsets or smaller tasks within the larger task
- Story: A functionality that you need you work on
- Bug: An error or flaw within a certain functionality
- Epic: A large piece of work with many issues included
- Incident: A reported incident within the process
- Service Request: User request for a service/support
- Change: A change in current technologies or functionalities
- Problem: Tracking the causes of incidents
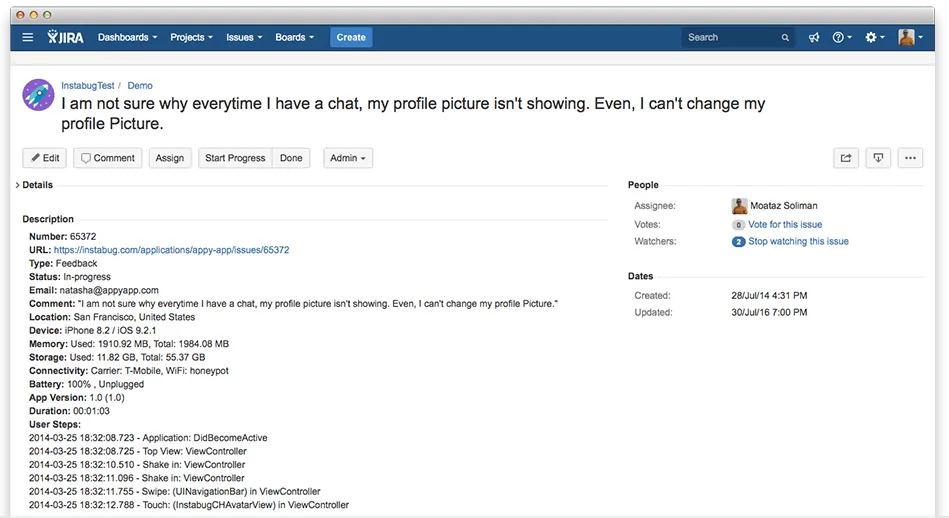
Issue details
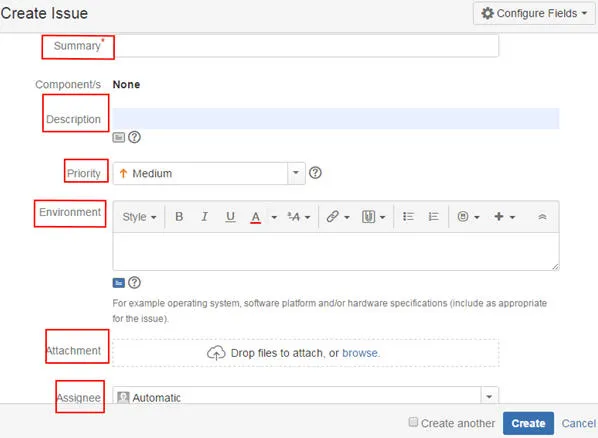
When you're creating an issue, you need to enter details. This information changes based on the issue type.
For bugs, the information you need to input is:
- ID: Assigned automatically by Jira.
- Summary: A quick description of the bug.
- Description: The more detailed the description is, the easier it is to identify the solution.
- Priority: The level of severity of the bug.
- Environment: Things like device, operating system, battery life, network connectivity, etc.
- Attachment: Any screenshots, documents, voice notes, or video recordings that can assist in identifying and fixing the bug.
- Assignee: The person assigned to handle this issue. (Will be discussed in more details next)
- Status: Created automatically upon creation based on your workflow. By default, Jira assigns an issue in the beginning as "New" or "To Do".
Assignees
Jira allows you to assign one, or more people, to issues to work on them, like assigning a developer to fix a certain bug for example. You can also automate this step, by having it change the assignees automatically when transitioning from one status to another. So you can have it change the assigned team member on the bug report from a developer to a QA member when transitioning to the review part of the process for example.
It also allows you to set permissions on who can transition an issue from a certain status to another. So in our example, you would allow the team lead who determines which bug to work on depending on urgency and severity to be able to move an issue from being on “On Hold” to “In Progress” and assign the appropriate team members to work on them. Once done, the team members would be allowed to move the bug to “Fixed”. At this point, only the QA team members would be allowed to move the bug from “Fixed” to "Under Review" and then "Approved", if it passes the test, or send it back to be fixed again.
Activity
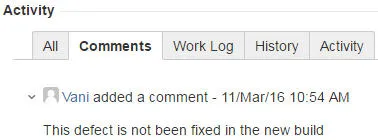
Every issue has an activity section. This includes the work log and history of all the activities that occurred with that issue. Since each issue can be assigned to multiple people, the comments section helps people collaborate on the same issue in a more efficient way.
Links
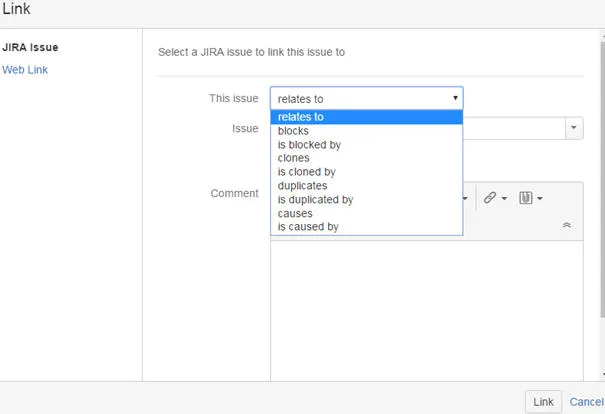
Jira allows you to link multiple issues together if they have some sort of relationship together.

This is very helpful in terms of bug reporting. If multiple people report the same bug, you can link the issues together, instead of having multiple issues open for the same bug. If you notice that one bug causes another bug, you can also link them so that developers understand their relationship and prioritize which one to fix first.

Jira helps you generate many different kinds of reports to give you more insight into your issues.
- Average Age Report: Shows the average duration/age of unresolved issues in days.
- Created Vs. Resolved Issues Report: Shows the number of issues created as opposed to the number of issues resolved over a period of time.
- Pie Chart Report: Shows the search results from a specified issue filter (or project) in a pie-chart, based on a statistic of your choice.
- Resolution Time Report: Shows the average time taken to resolve issues.
- Recently Created Issues Report: Shows the rate at which issues are being created.
- Single Level Group By Report: Shows the search results from an issue filter, grouped by a field of your choice.
- Time Since Issues Report: Shows the number of issues for which your chosen date field (e.g. 'Created') was set on a given date.
- Time Tracking Report: Shows time tracking information on issues for a particular version of a project.
- User Workload Report: Shows how much work a user has been allocated, and how long it should take.
- Version Time Tracking Report: Shows progress towards completing a given version, based on issues' work logs and time estimates.
- Version Workload Report: Shows how much outstanding work there is (per user and per issue) before a given version is complete.
- Workload Pie Chart Report: Shows the relative workload for assignees of all issues in a particular project or issue filter.
Exporting data

You can export your Jira data into a downloadable file, either to view it in different formats or to keep it as a backup.
Here is the data you can export:
- Issues
- Users and user group settings
- Issue attachments, user avatars, and project logos
Importing data
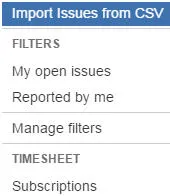
As you probably realize by now, the process of creating issues can definitely be time consuming. Jira allows you to import bulk of issues from a CSV file. This can be very helpful if you're migrating from another tool or if you want to compile all the issues to one file for ease and then add them all together.
Let's say your mobile app is in beta testing and you have hundreds of testers. Every time a tester finds a bug, they'll have to stop the app, then either head to Jira to create an issue or head over to a shared Google Excel Sheet that you set up, add all the information about the bug they found, and by the end of the day, you import all the reported bugs to Jira.
There are definitely a lot of problems with that approach. It's not very efficient, and you'd have to work on setting permissions for your testers, either on your Jira project or Google Sheets. Plenty of device environment data could be hard to find or would take the testers a long time to do so. Which is why it's highly recommended that developers integrate a Jira bug reporting tool.
To manage bugs, you first need to find them using a Jira bug reporting tool. Bug reporting tools help you find and record the bugs. They can also give you insight into more detailed info that you may not have access to. This could help you identify the cause of the problems in a faster and more efficient manner.
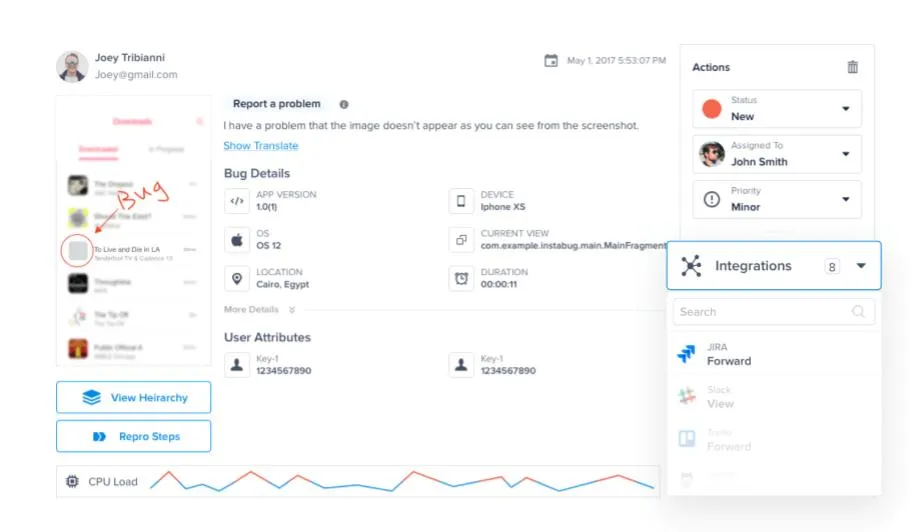
Instabug is a made-for-mobile platform that offers a comprehensive suite of products, including Bug Reporting, Crash Reporting, App Preformance Monitoring, Session Replay, Release Management, App Ratings and Reviews, and In-App Surveys. It is known for its Shake-to-Send feature, an intuitive user gesture that automatically activates bug reports from within the apps on which Instabug is installed.
With each bug report, Instabug automatically captures a screenshot that users can annotate by drawing on, blurring, and magnifying parts of it. Users can also attach further screenshots, voice notes, and screen recordings of the app to provide further context for the bug. In addition, Instabug automatically sends detailed user data to developers, including the user steps needed to reproduce each bug and network request logs.
If you have hundreds of beta testers and thousands of users, using a bug reporting tool is a no-brainer because it automates the most time consuming and tedious aspects of managing your bug reporting flow in Jira. With Instabug, the back-and-forth of collecting repro steps and environment information from your users is eliminated since Instabug captures all of this info automatically and sends it to you. And with an Instabug-Jira integration (found also on the Atlassian Marketplace), you don't have to manually create a new issue for every bug and manually enter all of the data, Instabug does this automatically for you.
Once you sign up to Instabug, you can incorporate the SDK into your mobile app as well as integrate it with your Jira bug reporting project in just a couple of minutes.
Instead of manually logging issues into Jira, you can have them forwarded over there directly from your mobile app with Instabug. You can either choose to forward everything automatically, forward only bug reports that match specified criteria, or forward bug reports manually as you see fit.
And now with your life made easier thanks to Instabug and Jira, you can focus on the most important part: squashing bugs!
Want to try our latest AI features?
Sign up to the closed beta now
Oops! Something went wrong while submitting the form.
Learn more:
- Mobile App Bug Reporting Best Practices
- The Ultimate Guide for Beta Testing Apps
- Bug Reporting Best Practices for Mobile QA
- Bug Reporting Best Practices for Live Apps
Instabug empowers mobile teams to maintain industry-leading apps with mobile-focused, user-centric stability and performance monitoring.
Visit our sandbox or book a demo to see how Instabug can help your app


